
Whether you’re on the lookout for a practical solution to hold the reins of Kubernetes, or an active Rancher 1.6 user, this blogpost on Rancher 2 may be of interest to you.
What is Rancher 2?
If you only take a quick look at Rancher, you might think it’s “just” a simple graphical interface and wonder how it differs from the official Kubernetes dashboard. However, there is a world between the two, since Rancher also manages :
- cluster installation and maintenance
- user identification (authentication)
- incoming HTTP traffic (what we call ingress in Kubernetes)
- integrated metrics, with Prometheus and Grafana
The diagram below gives a good idea of all the features offered:
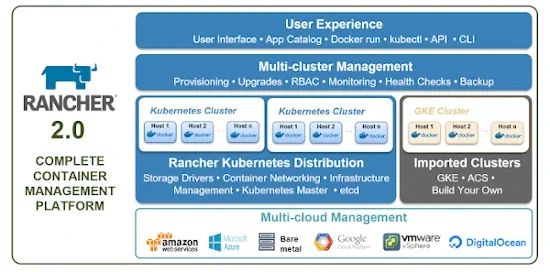
So it is indeed a Kubernetes distribution, integrating bricks that are essential to a realistic use in production; in the same way as competing products like OpenShift or Ksphere, for example. Here the open-source approach will be greatly appreciated!
Before going any further, I’ll point out that at Enix, even though we work a lot with Rancher (which we’ve been using since the first versions, when they were based on Docker), we can help you with your Kubernetes deployment whatever your deployment model. That’s it, let’s get back to our sheep… Or our cows, since that’s Rancher’s mascot!
Introduction - Modus operandi
In this blogpost, I will review with you the three possible installation methods for Rancher 2:
- Option A: you seek to simplify (or even hide) the management of Kubernetes.
- Option B: you keep full control over Kubernetes, but add functionalities.
- Option C: Rancher is installed on the cluster itself, without persistent storage.
Everyone will have their preference, I personally use all three options depending on the goal.
In order to avoid a lengthy blog post, I’m completely skipping Rancher’s High-Availability (which is possible in all three cases), and I’ll probably come back to it in another blog post.
I don’t use Cloud Provider functionalities (like LoadBalancer) in order to be as generic as possible.
Finally, I’m basing this on Rancher 2.4.4, but the concepts seen below will probably be valid for most future versions.
Option A: Self-guided installation
Welcome to the comfortable world of all-inclusive installation with Rancher 2, you will no longer suffer from the complexity of Kubernetes!
The operation is done in two steps:
- Installing Rancher 2
- Creating a Kubernetes cluster in an automated way
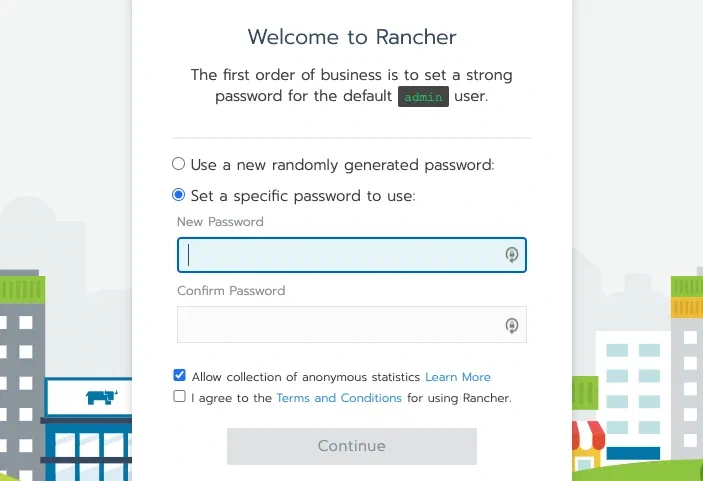
Option A step 1: Rancher
Rancher 2 is installed in its own environment, for example on a simple VM already running Docker :
docker run -d --restart=unless-stopped \
	-p 80:80 -p 443:443 rancher/rancher:latest
or with some options and retrieving a certificate via_ let’s encrypt _:
docker run -d --restart=unless-stopped \
	-p 80:80 -p 443:443 --name=rancher-2.4.4 \
	-v /opt/rancher:/var/lib/rancher \
	rancher/rancher:v2.4.4 --acme-domain rancher-rke.blogpost.enix.io
In less than a minute you should be able to reach Rancher 2 on the machine’s IP, and in HTTPS!
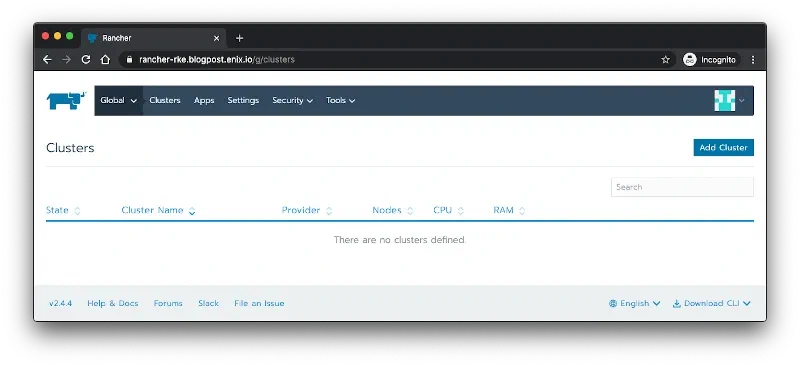
Option A step 2 : Kubernetes
Now let’s add a cluster in automatic mode, and here you have several choices:
- On virtual machines of a cloud provider (Amazon, Azure, OVH, DigitalOcean, …)
- Or via the Kubernetes offers of cloud provider (Amazon, Azure and Google)
- Or From existing nodes (Custom), this is the option I’m going to use!
So I will name my cluster rancher-rke since our approach relies on the rke brick to install Kubernetes. I will then (voluntarily) select an old version of Kubernetes and keep everything else by default:

On the next page, I am presented with a wizard that generates a Dock command line:

So I run my first master node by selecting etcd and Control Plane and apply the resulting command line to a new virtual machine:
docker run -d --privileged --restart=unless-stopped --net=host -v /etc/kubernetes:/etc/kubernetes -v /var/run:/var/run rancher/rancher-agent:v2.4.4 --server https://rancher-rke.blogpost.enix.io --token <caviardé> --etcd --controlplane
Without changing the web page I should see a beautiful :

Rerun on a new VM selecting Worker only … and … tada!
Bring up the Pods !
To conclude this first step, I leave you the surprise of editing the cluster by yourself to select the latest version of Kubernetes and see the magic happen. In the meantime, let me summarize my opinion on this first option:
pros
- The simplest approach
- With the cheapest maintenance
- Totally in the spirit of Rancher 1.6
cons
- Integrations with existing infrastructure (especially network) are not obvious
- Difficult to activate alpha features
- Don’t expect to take advantage of the tutorials around
kubeadm!
Option B : I keep my hand on Kubernetes
No one touches my Kubernetes
We find two steps and a prerequisite to accomplish this second mission:
- Having a Kubernetes cluster already installed
- Installing Rancher 2
- Importing the cluster on Rancher
Option B step 1
The first step is identical to option A
Option B step 2
When creating the cluster on Rancher 2, I use the option Import an existing cluster:
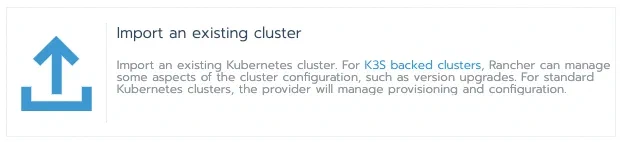
Rancher then offers me to apply Kubernetes specifications in order to import the cluster:
root@rancher-blog-kube-1:~# kubectl apply -f https://rancher-kube.blogpost.enix.io/v3/import/<caviardé>.yaml

clusterrole.rbac.authorization.k8s.io/proxy-clusterrole-kubeapiserver created
clusterrolebinding.rbac.authorization.k8s.io/proxy-role-binding-kubernetes-master created
namespace/cattle-system created
serviceaccount/cattle created
clusterrolebinding.rbac.authorization.k8s.io/cattle-admin-binding created
secret/cattle-credentials-c6e77ac created
clusterrole.rbac.authorization.k8s.io/cattle-admin created
deployment.apps/cattle-cluster-agent created
daemonset.apps/cattle-node-agent created
It becomes ready within a minute:

Let’s take the time to look at what just happened:
root@rancher-blog-kube-1:~# kubectl get namespaces
NAME              STATUS   AGE
cattle-system     Active   2m52s
default           Active   16m
kube-node-lease   Active   16m
kube-public       Active   16m
kube-system       Active   17m
root@rancher-blog-kube-1:~# kubectl get all --namespace cattle-system
NAME                                        READY   STATUS    RESTARTS   AGE
pod/cattle-cluster-agent-545fff6958-nk5qv   1/1     Running   0          4m24s
pod/cattle-node-agent-k9xxs                 1/1     Running   0          4m11s
pod/cattle-node-agent-vtbb5                 1/1     Running   0          4m7s

NAME                               DESIRED   CURRENT   READY   UP-TO-DATE   AVAILABLE   NODE SELECTOR   AGE
daemonset.apps/cattle-node-agent   2         2         2       2            2           <none>          4m39s

NAME                                   READY   UP-TO-DATE   AVAILABLE   AGE
deployment.apps/cattle-cluster-agent   1/1     1            1           4m39s

NAME                                              DESIRED   CURRENT   READY   AGE
replicaset.apps/cattle-cluster-agent-545fff6958   1         1         1       4m24s
replicaset.apps/cattle-cluster-agent-6fc8f7fc65   0         0         0       4m39s
Ok, so I have a Rancher agent running on each of my nodes in the cattle-system namespace!
Some remarks:
pros
- This approach is extremely fast to set up
- I keep a total freedom of action on my Kubernetes cluster
- However, I can also benefit from most of Rancher 2’s other functionalities
cons
- The maintenance of the Kubernetes cluster cannot be overlooked
- The ingress pre-installed by Rancher in option A, must be added here in a second time, via the applications
Option C: Inception
This all-in-one approach is no joke
In this last strategy, I will combine two issues:
- Avoiding consuming resources outside of the Kubernetes cluster.
- Remember that in options A and B, I use a virtual machine for Rancher 2.
- Industrializing the way I install Rancher 2 via the
Helmtool! - If you’d like to dig into Helm 3, Julien has a complete debrief on Helm 3.
This time, the installation procedure is a bit more complicated: Rancher 2 runs inside the cluster, so the Rancher 2 WebUI won’t be accessible from the outside without an ad-hoc configuration.
I see two difficulties here:
- Exposing ports 80 and 443
- Setting up what it takes to get an x509 certificate automatically
Option C Step 1: Installing an ingress
You can skip this step if one of the known ingress controller (nginx, traefik, haproxy, …) or unknown is already running on your cluster.
Kubernetes allows you to route incoming HTTP traffic via ingress resources. So I install an ingress controller to properly expose my Rancher 2 service.
The good news is Kubernetes offers an ingress controller by default, with a Helm chart, and the documentation here.
In the generic spirit of this blog post, I will add some options to use ports 80 and 443 of my worker nodes.
kubectl create namespace ingress-system
helm repo add ingress-nginx https://kubernetes.github.io/ingress-nginx

helm install blog-enix-rancher ingress-nginx/ingress-nginx \
	--namespace ingress-system \
	--set controller.hostPort.enabled=true \
	--set controller.kind=DaemonSet
root@rancher-helm-1:~# kubectl get pods --namespace ingress-system
NAME                                          READY   STATUS    RESTARTS   AGE
blog-enix-rancher-ingress-nginx-controller-ctz5g   1/1     Running   0          30m
Connecting to the node’s ip with http, I get:

For once, this is normal! The Ingress controller doesn’t know where to direct the traffic.
Option C Step 2: Installing cert-manager
The Rancher 2 documentation tells me that the certificate will be obtained through cert-manager, which I use very often, and which by the way I highly recommend!
Here we go again for 2 minutes of Helm:
kubectl create namespace cert-manager
helm repo add jetstack https://charts.jetstack.io
helm install cert-manager jetstack/cert-manager \
  --namespace cert-manager \
  --version v0.15.1 \
  --set installCRDs=true
root@rancher-helm-1:~# kubectl -n cert-manager get pods
NAME                                      READY  STATUS   RESTARTS  AGE
cert-manager-7747db9d88-fxzlm             1/1    Running  0         14s
cert-manager-cainjector-87c85c6ff-jbwqt   1/1    Running  0         14s
cert-manager-webhook-64dc9fff44-mqxdn     1/1    Running  0         14s
At this point, I’m ready to launch Rancher !
Option C Step 3: Rancher
You were promised a one-line installation … here it is they are!
kubectl create namespace cattle-system
helm install rancher rancher-latest/rancher \
  --namespace cattle-system \
  --set hostname=rancher-helm.blogpost.enix.io \
  --set ingress.tls.source=letsEncrypt \
  --set letsEncrypt.email=<caviardé>
A little bit of patience and you will have access to your instance in HTTPS :
The underlying cluster is usable immediately in Rancher 2. You can however disable this addition via the addLocal option of the Helm chart to set to false.
Phew, we’re done!
Now let’s look in detail at what’s running on the cluster:
root@rancher-helm-1:~# kubectl get namespace
NAME                 STATUS   AGE
cattle-global-data   Active   2m12s
cattle-global-nt     Active   2m11s
cattle-system        Active   3m17s
cert-manager         Active   4m26s
default              Active   14m
ingress-system       Active   7m22s
kube-node-lease      Active   14m
kube-public          Active   14m
kube-system          Active   14m
local                Active   2m12s
p-6g7hh              Active   2m12s
p-mv6gz              Active   2m12s
That’s a lot of namespaces … note local which corresponds to the Rancher configuration of this Kubernetes cluster, plus the p-* which correspond to Rancher projects, and there are also almost 68 CustomResourcesDefinitions installed in Kubernetes.
Rancher actually uses the Kubernetes API to store all its data, so one can even talk about a stateless application (provided one is very open-minded …).
pros
- No resources outside the Kubernetes cluster
- No dedicated persistent storage to set up
- Installing Rancher like any other application on a cluster
cons
- As an Ops, you will have to deal with all these specific resources
- Rancher adds load on the Kubernetes API
- De-installation is not trivial
To Conclude
Rancher 2 is an extremely flexible Kubernetes distribution and it deserves a try!
Use cases are numerous, updates are frequent, and the user community is huge.
We are organizing a (free) workshop on June 23, 2020 in collaboration with the Cloud Native Computing Foundation and Rancher. You will be able to work online with a trainer, and discover all the features of Rancher 2. More information here.
Do not miss our latest DevOps and Cloud Native blogposts! Follow Enix on Linkedin!